- TOSIZE.ie
- Do it yourself
- DIY Projects
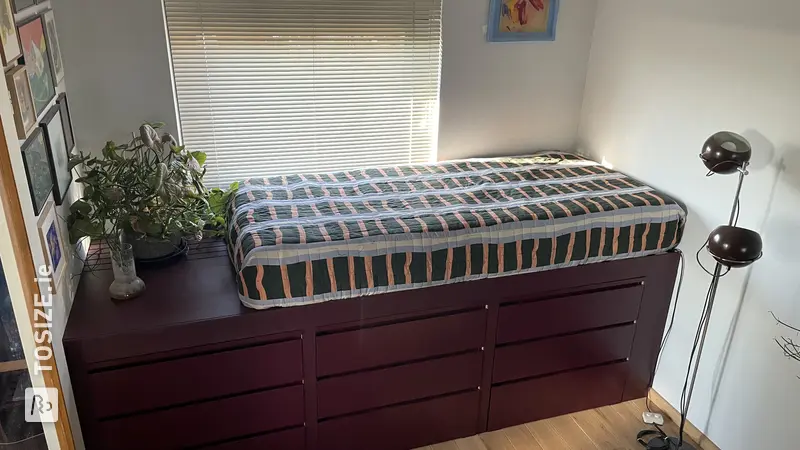
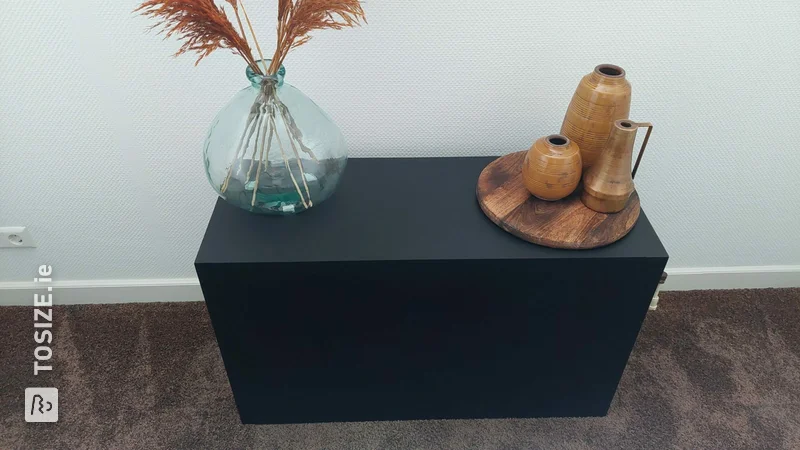
A unique custom side table made of MDF, by Rens
A unique custom side table made of MDF, by Rens

Create this project yourself with sheet material cut to size by TOSIZE.ie!
R
Very easy
3 minutes
Description of Rens
Side table for behind the sofa, with its own power supply. Step 1 collect materials: wood glue, painter's tape, MDF screws, screw machine, wood drill 1 mm, eccentric sander, sandpaper grit 180, 4 hollow wall boxes, 4 built-in parts Busch Jaeger, 2 windows of 2, flexible power cable 3 core 5 meters with plug, Wago's 3, pieces of electrical wire, black MDF primer, 0.5 l water-based interior paint. Prepare step 2 and assemble sawn parts with masking tape. Step 3 Assembling sawn parts. Step 4 Installing electrical parts. Step 5 Filling and sanding. Step 6 Preparing for painting, finishing. Step 7 Install electrical windows. Step 8 Placing Side table
How I made this project
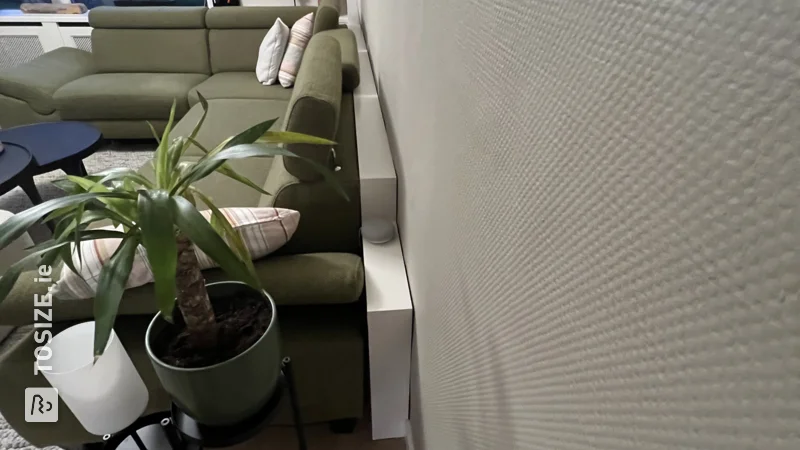
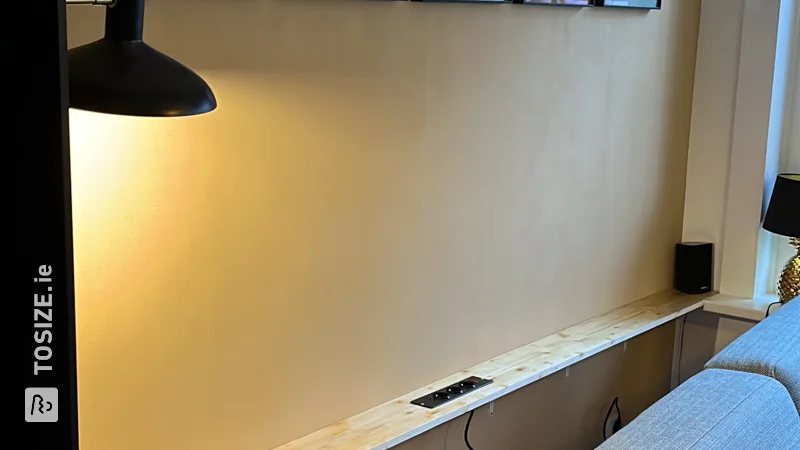
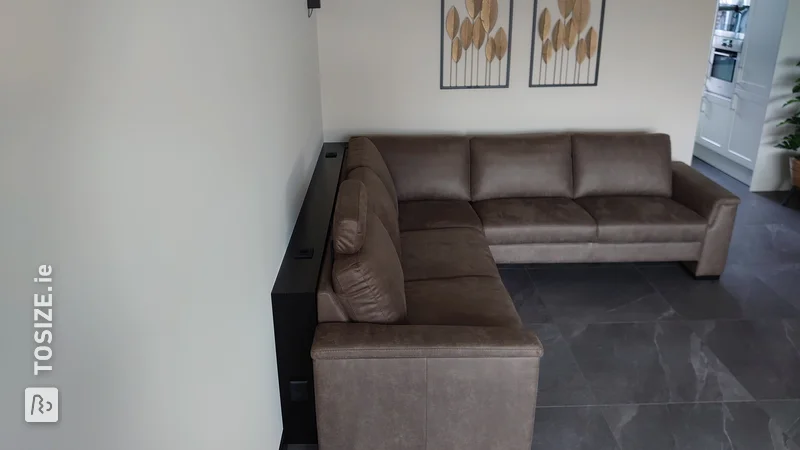
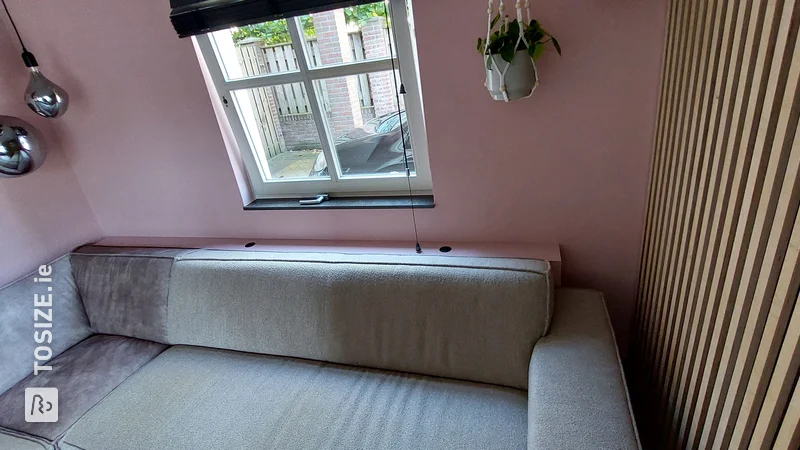
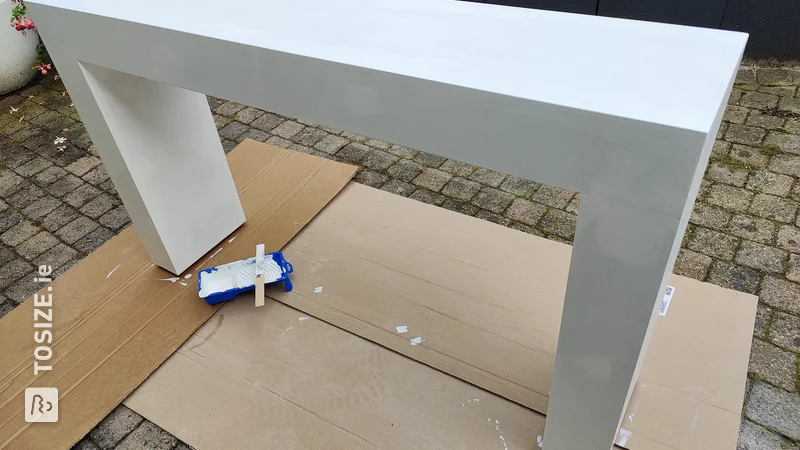
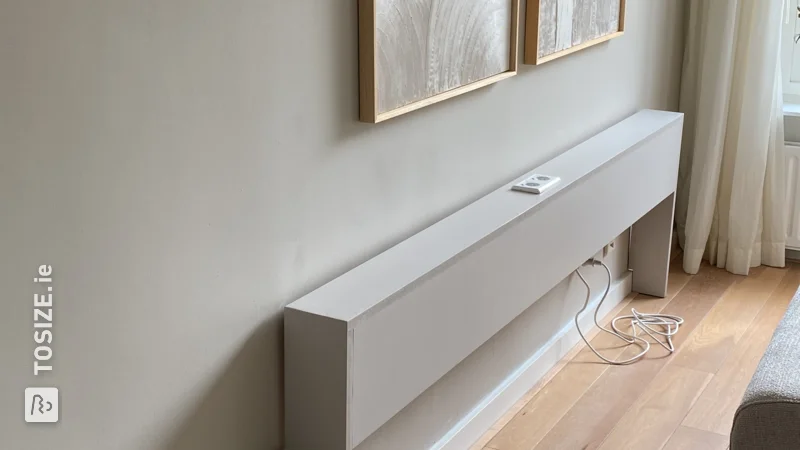
First we measured the ideal size, we have a high backrest so we used the size of 75 cm high. After ordering and receiving the sawn panels, I first assembled the side table with painter's tape. After checking, I first pre-drilled the legs, you don't drill all the way through MDF, but this is neater for tearing / splitting. Then screw both outside legs to the top. After this, place one side perpendicularly under the top and screw it in place. Here too I pre-drilled every 40 cm. For the next step you will need 2 slats to mount the bottom later. I used some leftover slats for this, which I attached at 18mm from the bottom using some wood glue and screws. Check with a residual plank from the sawing job whether the distance was correct. After this I mounted the other side. For the electrical points I used 4 hollow wall boxes from Attema. The built-in parts are made of Busch Jaeger future linear matt black. Electrical wire with ready-made plug neatly connected to Wago's. For a nice saw hole I used a 76mm hole drill. After installing the electrics, I filled in all the screw holes with the exception of the bottom, so you can always access the electrics later. I sanded everything smooth with an eccentric sander, so you can neatly solve any mistakes. After this I prepared the bottom, pay attention to the sawn dimensions, it will fit exactly, you may have to press a little. First I drilled a hole for the passage of the power cable, then I mounted the center legs (to prevent sagging). To do this, divide the inner measurement between the outer legs by 3. Then place the base plate with blind screwed legs in the recess and screw it in place. on the wooden slats. Then lift the side table with 2 people and place it on its legs. I first primed the side table with black primer, and then painted it in 2 layers with water-based lacquer color used Ral9011. After drying, all that remains is to install the electrical components.
Dimensions of my DIY project
H W D 75.0 x 240.0 x 15.0
Tip! Also check out our handy DIY tips!
What now?
Want to make this DIY project? Check out R's saw list and complete your order easily.
€139.02
All materials used
View all sheet materials