- TOSIZE.ie
- Do it yourself
- DIY Projects
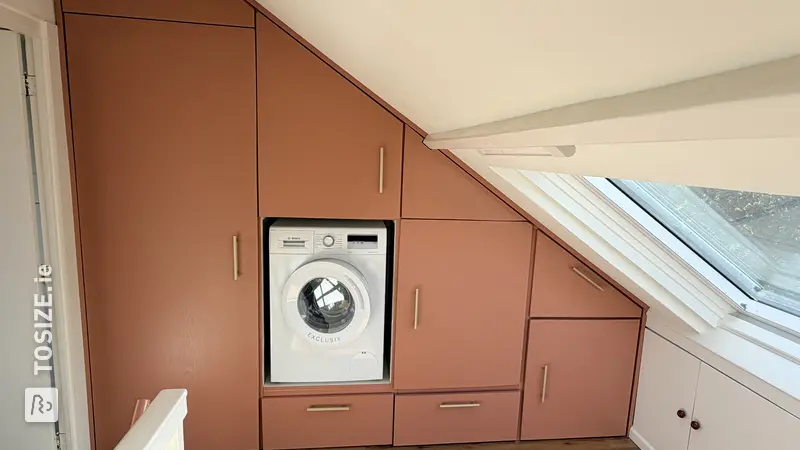
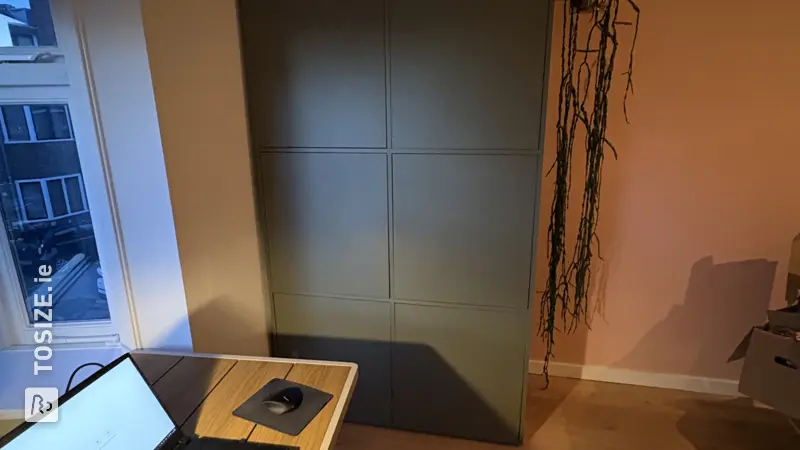
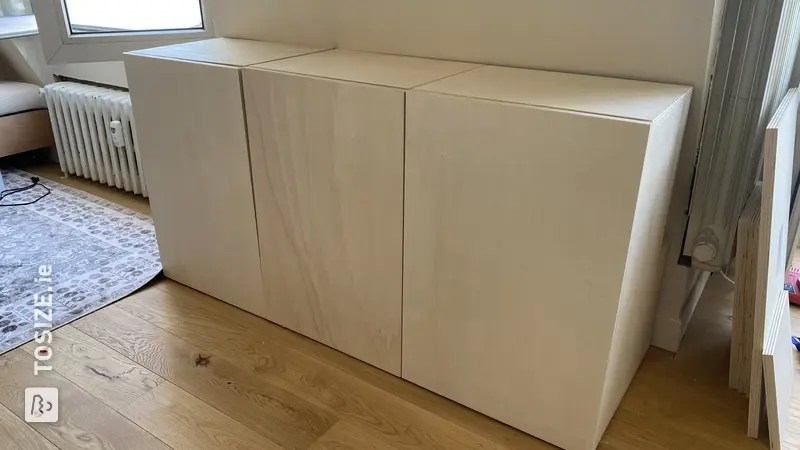
MDF cabinets for the office under a sloping roof, by Marc
MDF cabinets for the office under a sloping roof, by Marc

Create this project yourself with sheet material cut to size by TOSIZE.ie!
Marc
Above average
2 minutes
Description by Marc
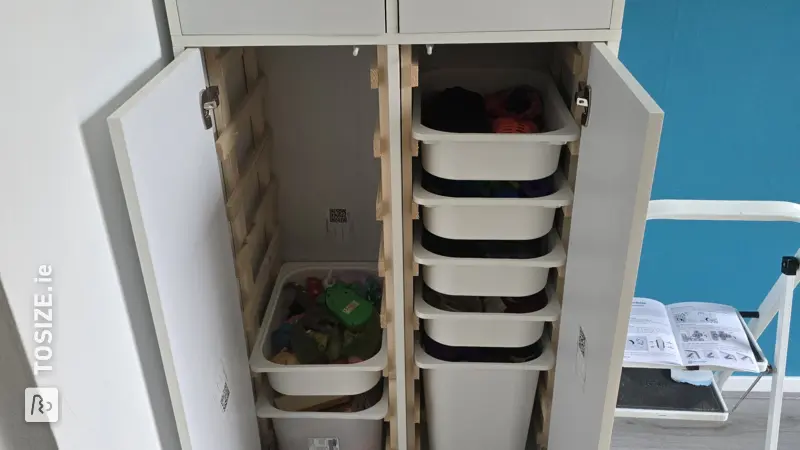
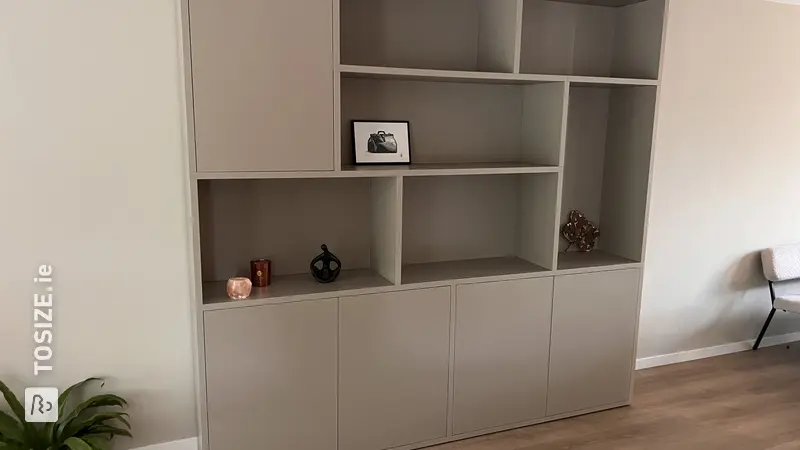
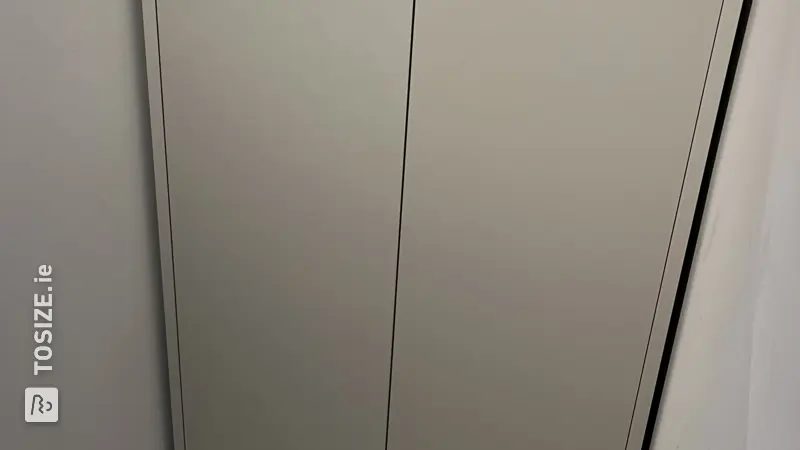
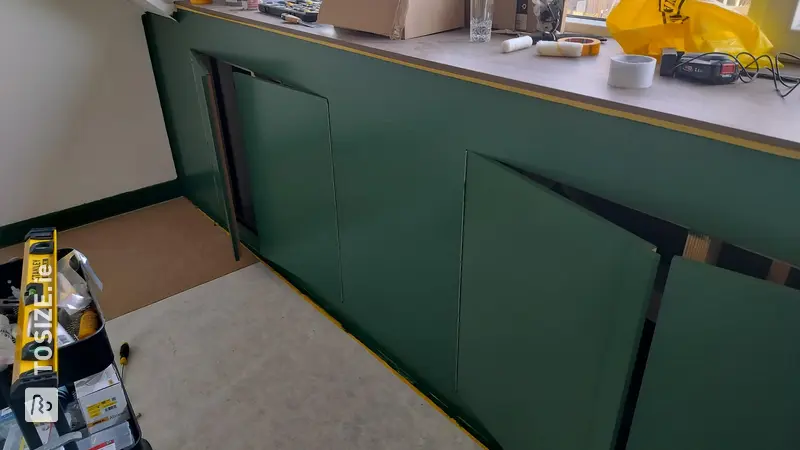
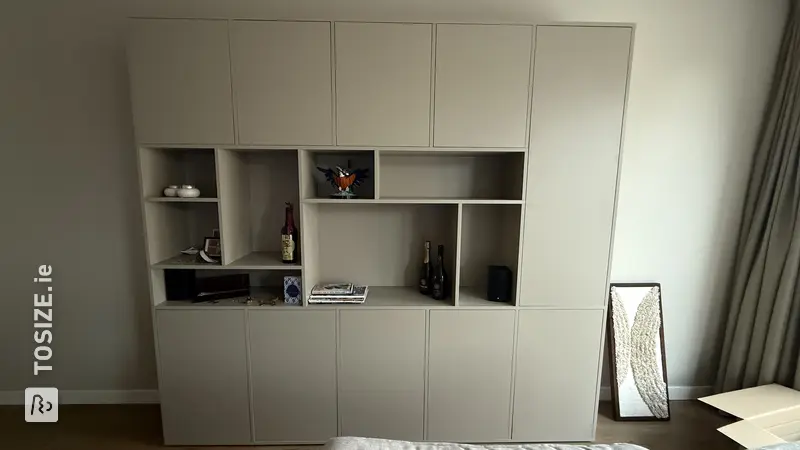
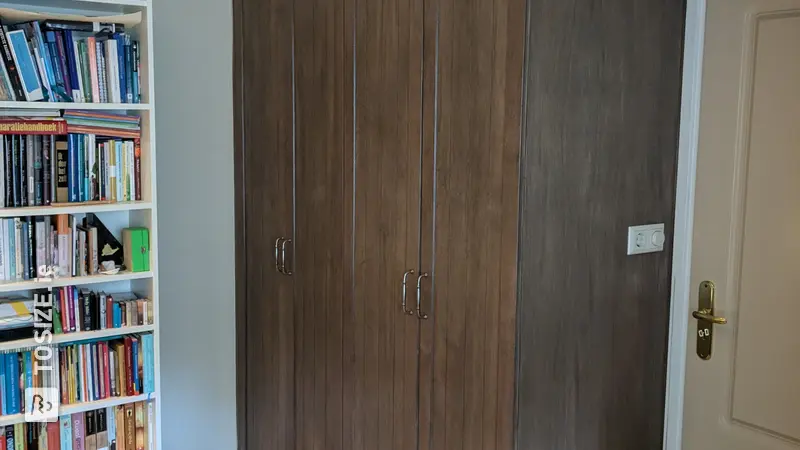
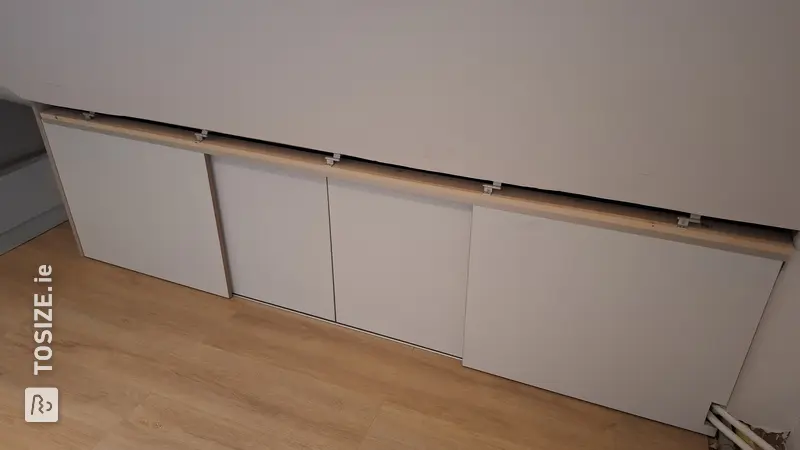
A series of 3 connected cabinets, creating a cabinet with 6 doors that fit between the walls and in front of the straight part of the sloping hood. Each cabinet is assembled only with wood glue. This is possible because the MDF sheet material is sawn completely at right angles. Each cupboard has 1 shelf that can be adjusted to 4 heights. The shelf at the bottom and top positions provides space for placing folders. The cupboard wall is almost 3 meters wide, so it had to be made in parts to be placed in the attic. The front gives the appearance of one handleless long cupboard. The doors are equipped with overlay soft-close hinges from Blüm. The cabinets are screwed together and each stand on 4 felt chair leg caps.
How I made this project
- Create a design sketch.
- Design work out in the free-to-download drawing program QCAD.
- Order panels on the website in 18mm MDF.
- After receiving the very well-packed panels, sort and check everything. li>Milling the 35mm hinge holes in the doors. Position these so that the doors fit on both the left and right.
- Align the door hinges on the side walls and pre-drill the holes.
- Mark and drill holes for the 5mm metal shelf supports. Each side wall has 2 rows of 4 holes on top of each other.
- You need 1 meter clamps to glue the parts.
- Gluing the 2 sticks of MDF together for the handleless edge.
- Glue the left side wall perpendicular to the rear wall.
- Glue the rear wall to the left side wall with the rear wall.
- Glue the right side wall.
- Glue the handle strip . (note that the dimensions between the side walls at the top and bottom are the same.
- Glue the top panel to the base cabinet.
- If the end edges protrude slightly, mill them evenly with a router with a cutter with a support bearing. If necessary, fill and sand again.
- Finish with Flexa paint tightly into the lacquer.
- Sand the front of the doors and top again and finish once. li>Screw 4 felt guides to the bottom, 40mm from the corner.
- Place the shelf supports at the desired height and insert the shelf.
- Assemble and adjust the door hinges.
- Place cabinets and align them against each other with glue clamps and screw them in place.
- Done!
Dimensions of my DIY project
1 cabinet is wide 96, 0 cm, high 60.0 cm and deep 62.0 cm
Tip! Also check out our handy DIY tips!
What now?
Want to make this DIY project? Check out Marc's saw list and complete your order easily.
€513.15
All materials used
View all sheet materials