- TOSIZE.ie
- Do it yourself
- DIY Projects
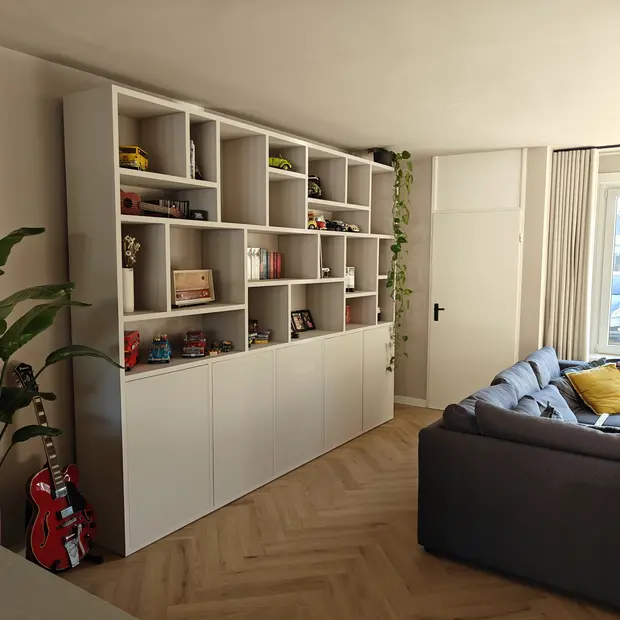
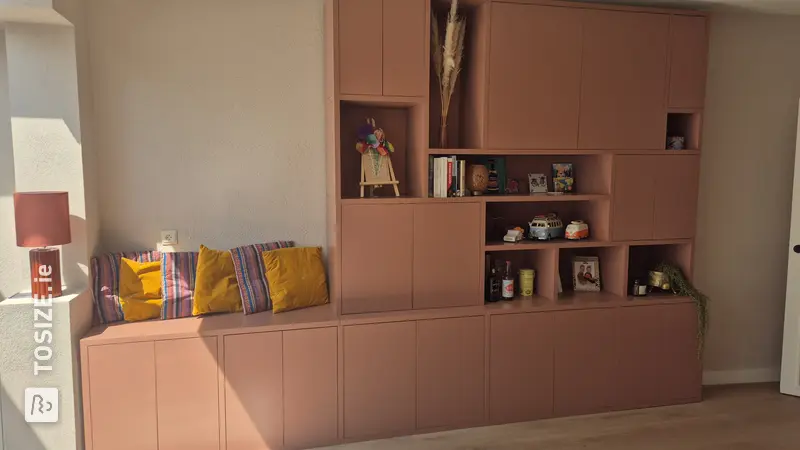
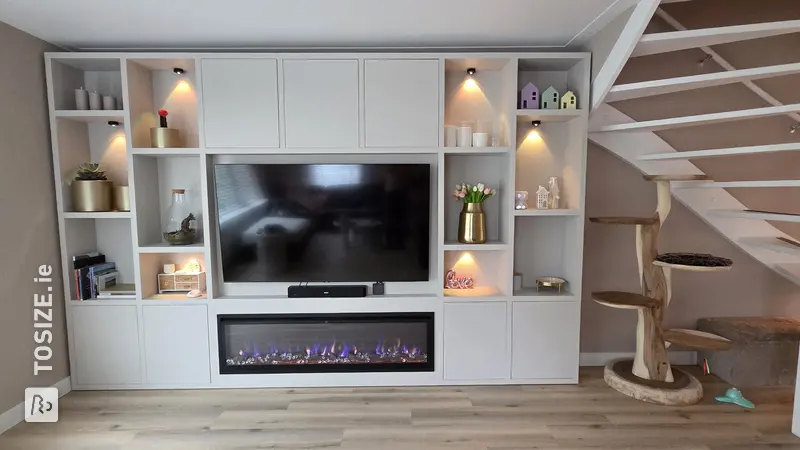
TOSIZE Furniture cupboard including TV, by Rob & Marleen
TOSIZE Furniture cupboard including TV, by Rob & Marleen

Make this furniture yourself using TOSIZE.ie
Rob
Average
4 minutes
Description of Rob and Marleen
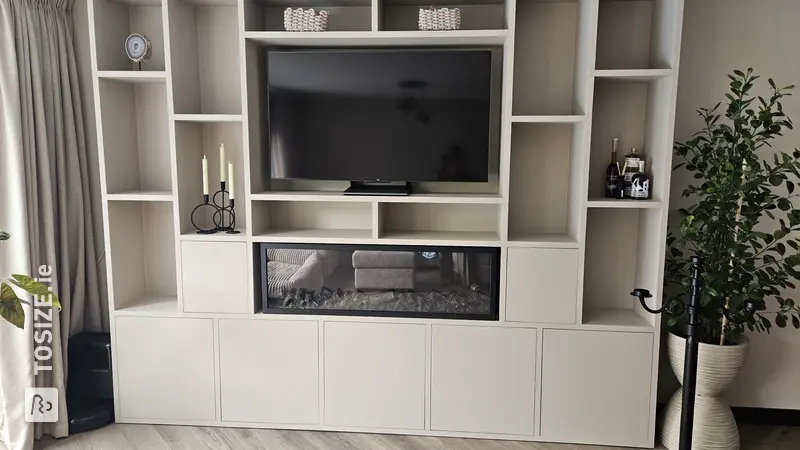
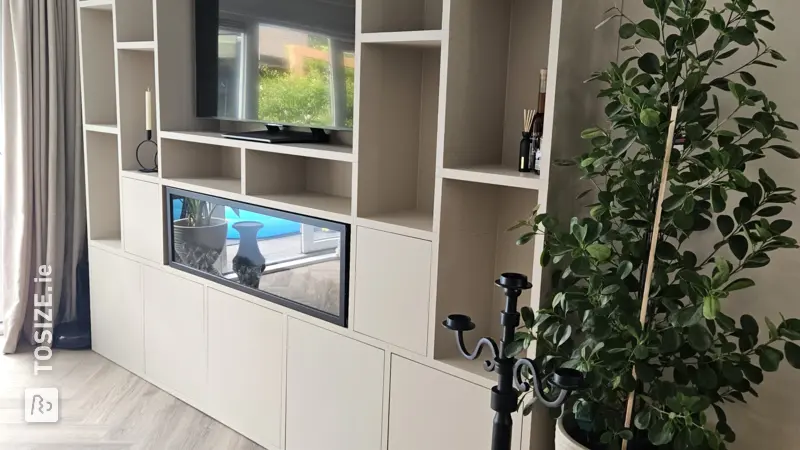
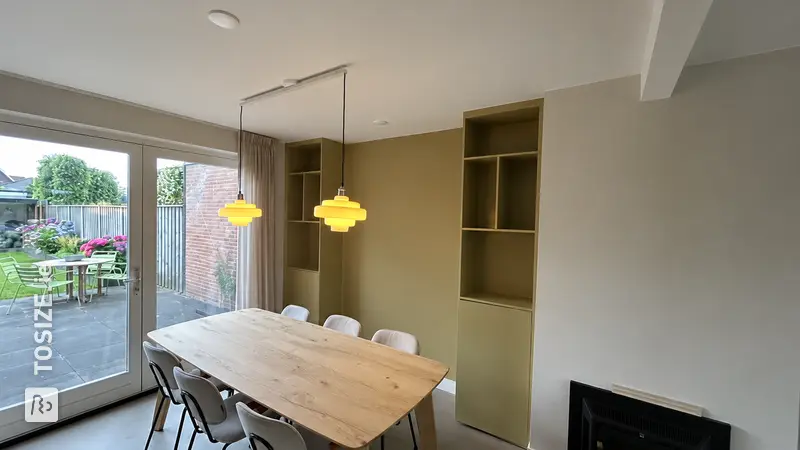
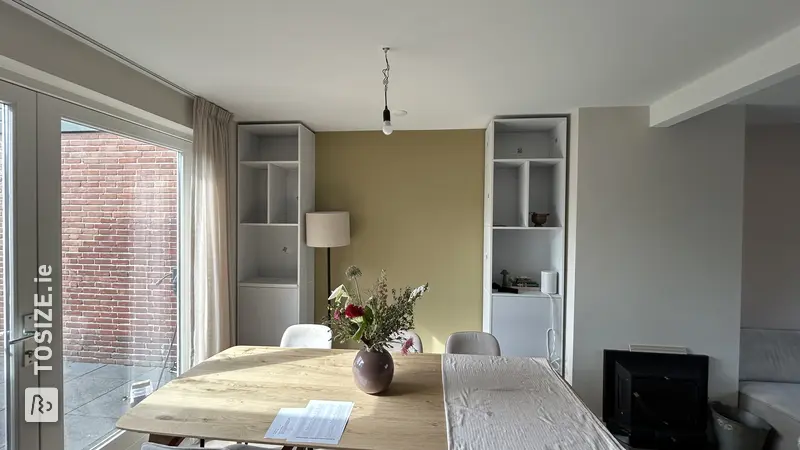
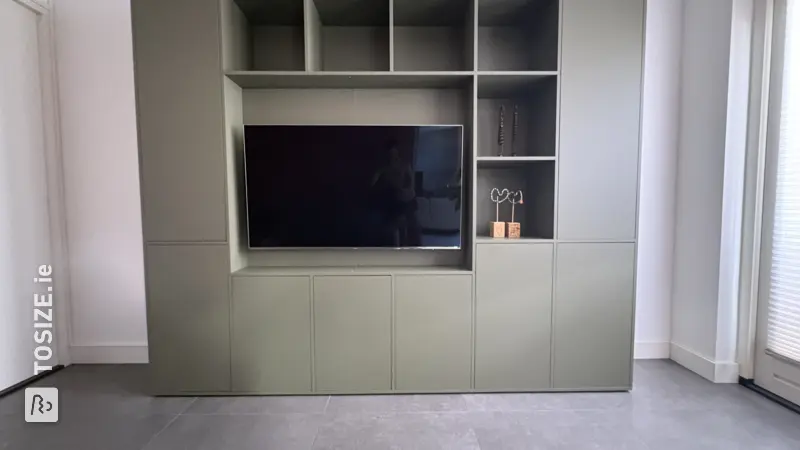
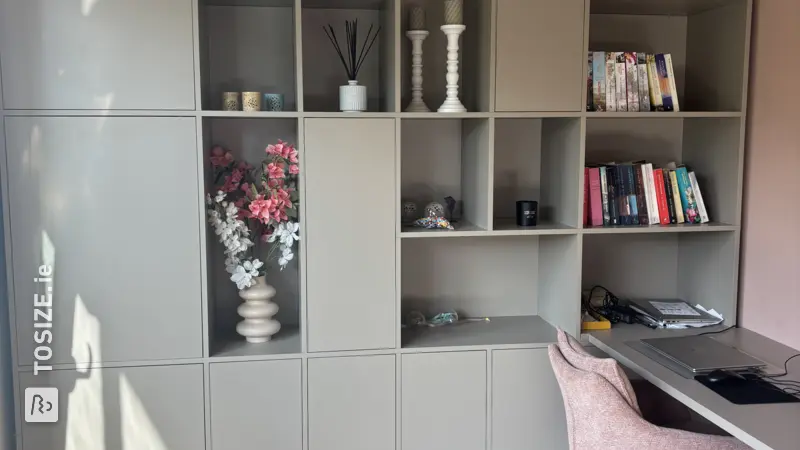
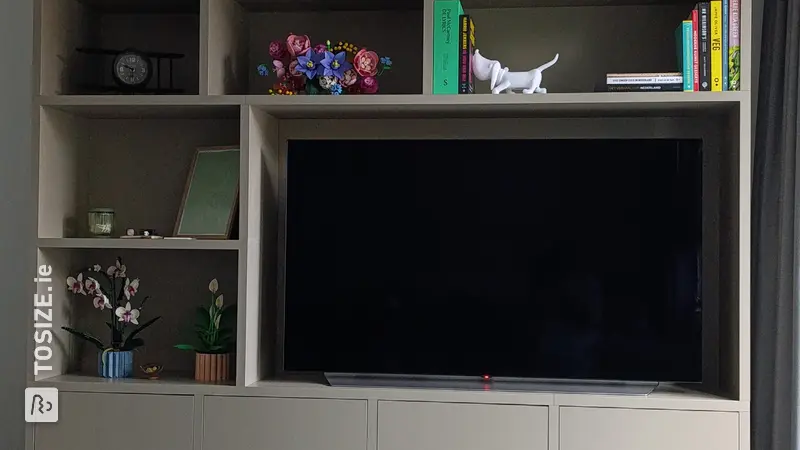
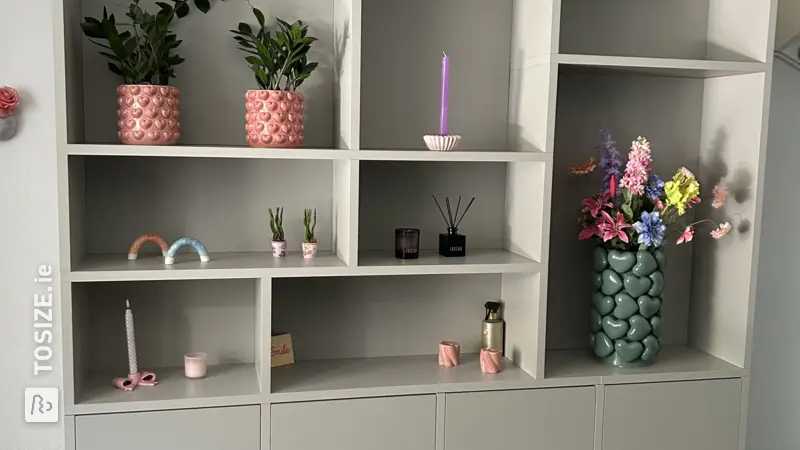
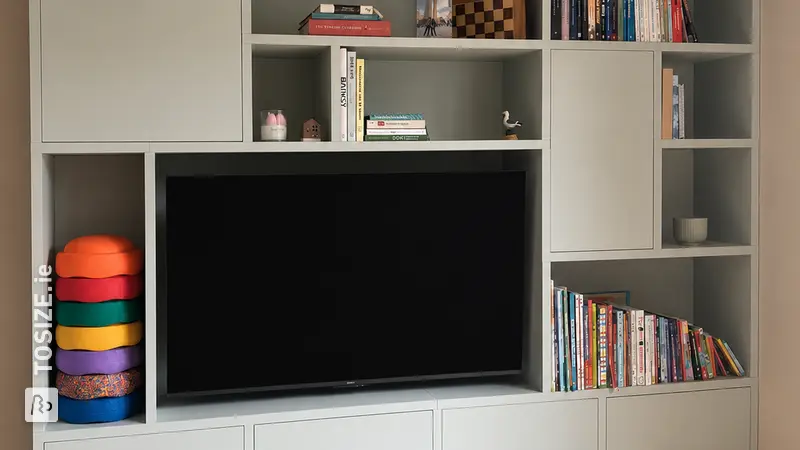
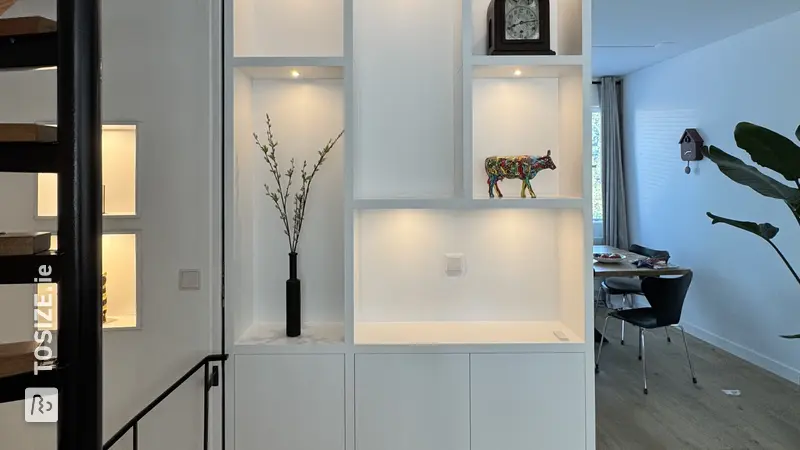
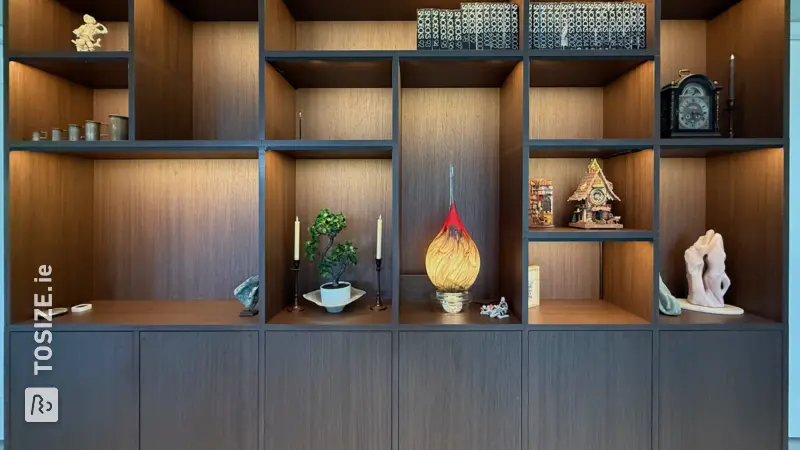
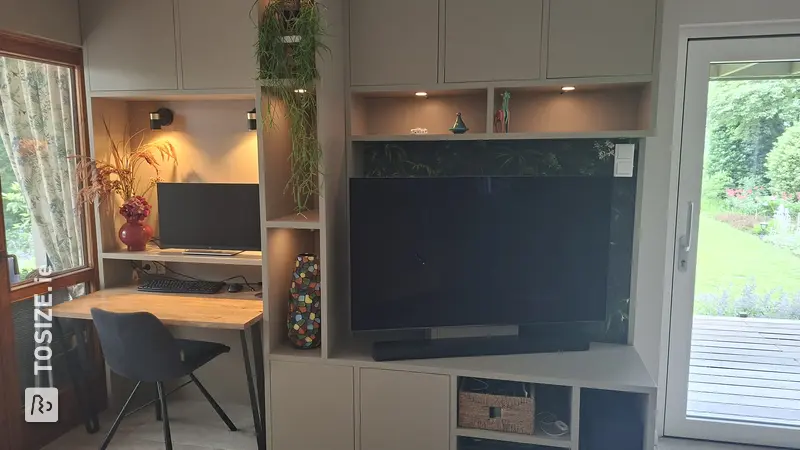
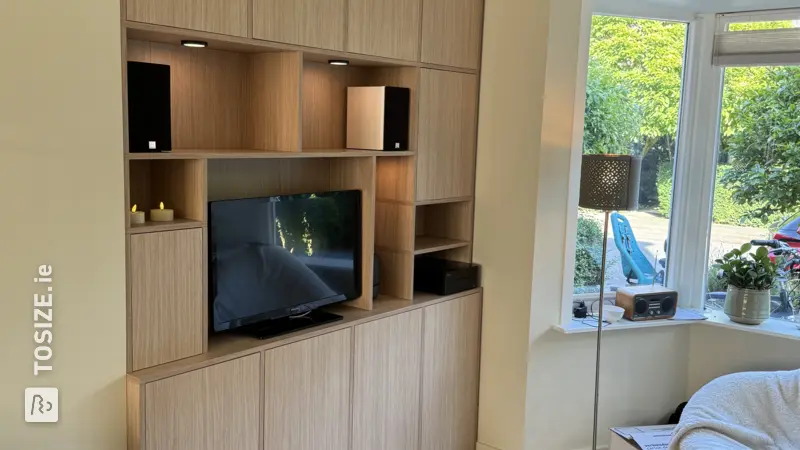
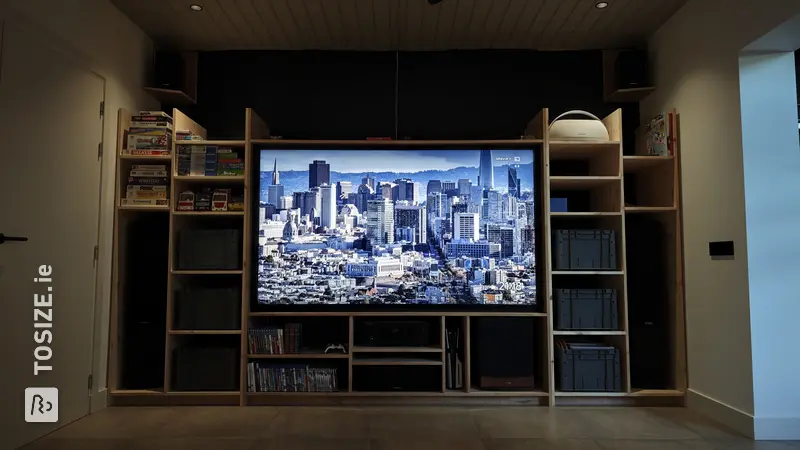
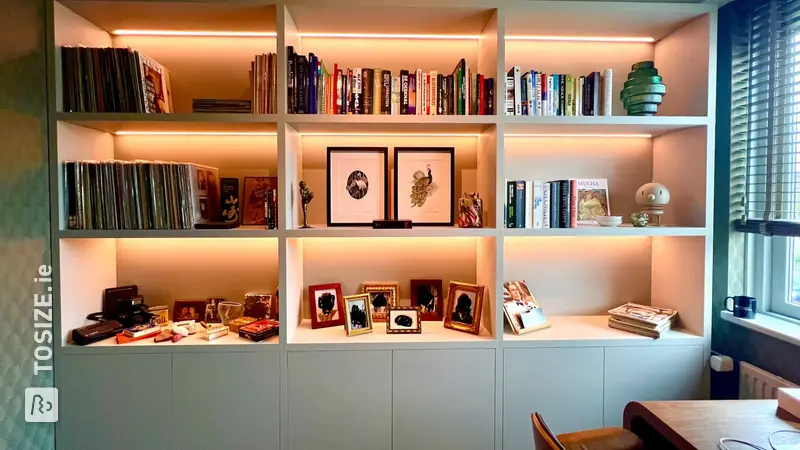
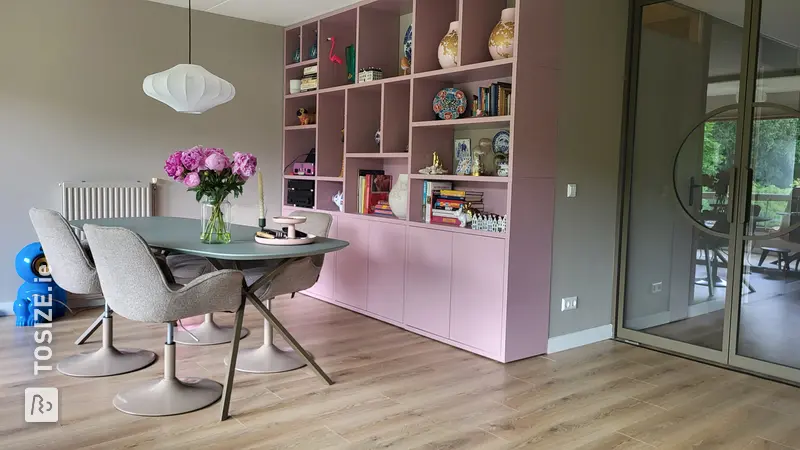
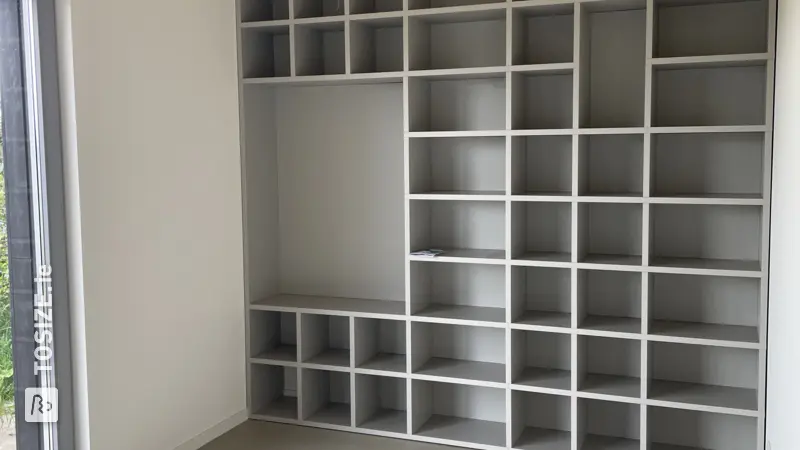
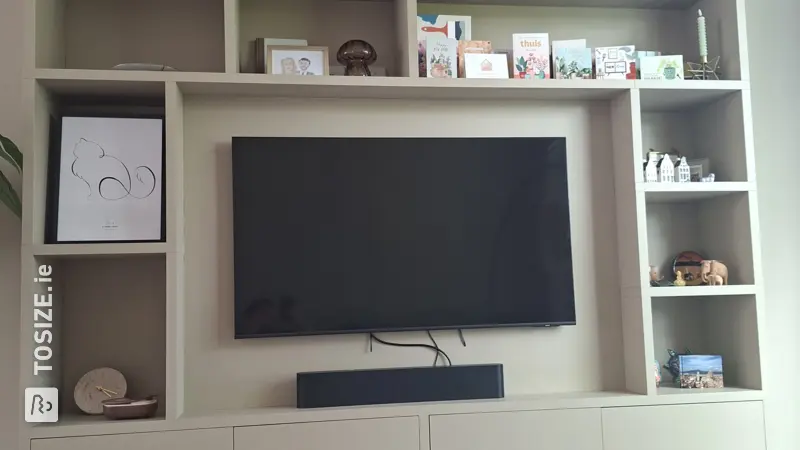
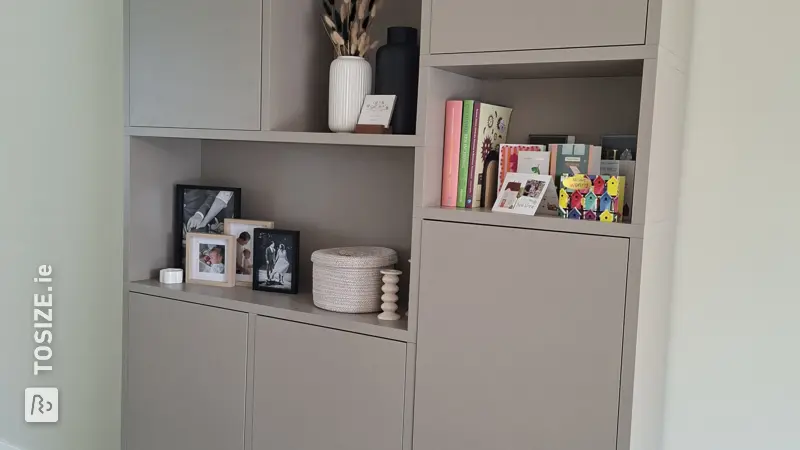
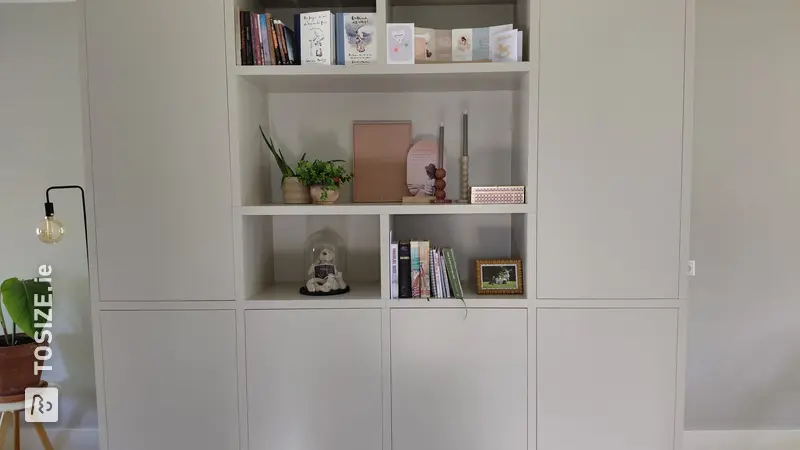
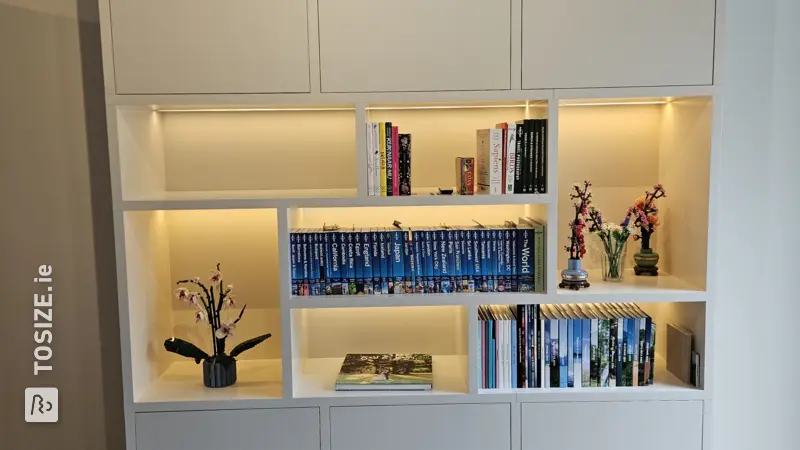
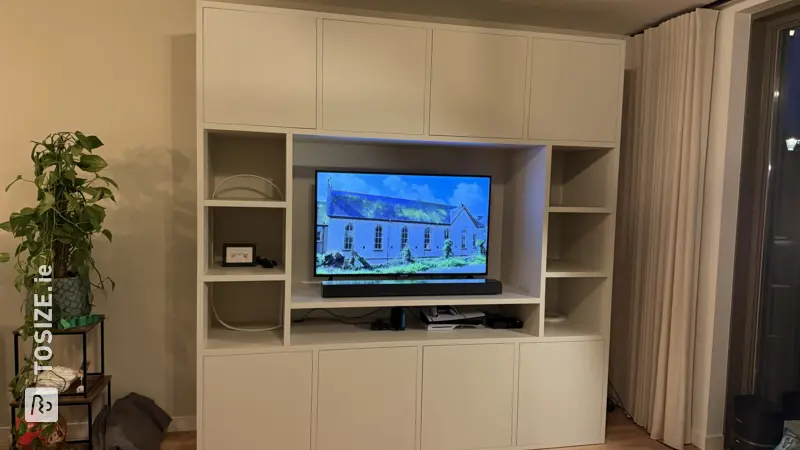
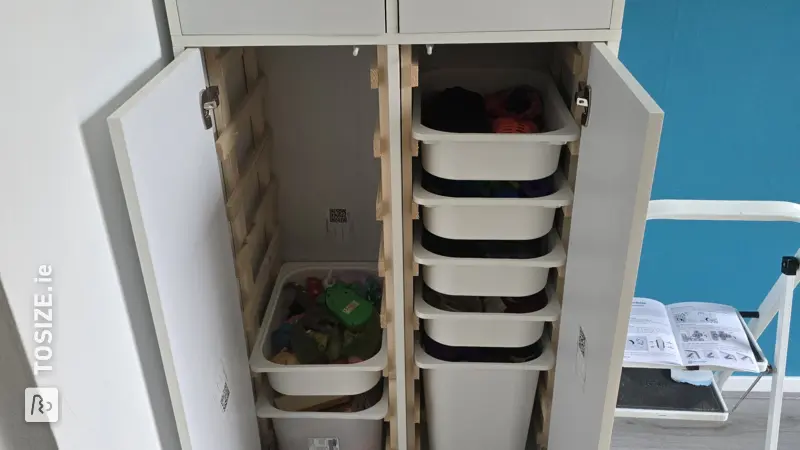
A few years ago we were able to have a house built. Our wish was lots of light and it was fulfilled. We have now also discovered that many windows also have a small disadvantage; there is very little wall to put a cupboard against. We have been looking for quite some time and have visited many furniture stores to find a suitable cupboard to store toys, place the TV and also something that we liked. This turned out to be impossible for us, and we decided that we were going to make something ourselves. Googling for suitable material for the cabinet, the doubt between MDF and plywood gave me the site of TOSIZE.ie. The cabinet configurator removed all doubts about making it yourself, because a construction kit can be put together, which makes the scope of the job a lot more manageable. However, we have had to make some concessions and adjust our thoughts. We wanted to vary in material thickness. An outer frame of 60mm with shelves and stands of 18mm. The TOSIZE.ie blog has given a lot of inspiration, but also made it more difficult. When buying a cupboard on the furniture boulevard, there is less to choose from, which makes it easier. Ultimately, we made a choice based on about 20 layouts. We have matched the height of the compartments to an existing bookcase: We would not go much lower than 30 cm. We have also used a minimum of 30 for the width of the compartments, so that nothing is crammed in. The TV was the basis for the dimensions. The cabinet is twice the TV width. We also used the TV for height, one and a half times the TV height. We have also had a design of 2.30 and even 2.60 meters. Then it becomes too solid an area between the windows. The cupboard is now 2.20 meters and is therefore deliberately lower than the windows between which it is located. Lighting was a challenge, it was difficult to find a reference. Surface-mounted spotlight, with cables in sight, we think it's a waste of the cabinet. I eventually found furniture spots at Ecobright in Doetinchem. These are small in diameter and extremely low. With a Fornster drill I drilled a hole of 55 mm and a hole perpendicular to it for the cable. This works fine and is simpler than expected. We have reflected the colors we used in our kitchen in the cupboard. Just because we liked it. The sides were a point of concern, but with the necessary filler and sanding it turned out fine.
How I made this project
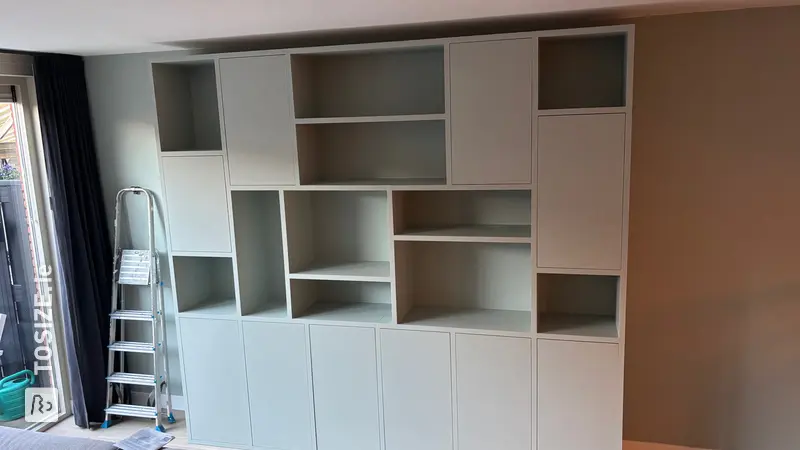
We started by arranging the parts in order, a useful tip from the description. We chose to separate the beams, uprights and rear panels, as we had this space. We then fitted the uprights and rear panels with dowels. I drilled the holes for the lighting in the beams. A morning of work, but after that it was just a matter of building up. The cabinet was assembled in just 2 hours. Filling, sanding, painting, that's where the work goes. We have chosen 2 colors. Next time I think I would paint the uprights and beams before assembling the cabinet. I suspect that gives a slightly tighter result in the corners. But that would mean that the parts to be plastered would have to be painted again. Installing the lighting was a piece of cake. Bought a transformer and dimmer from Ecobright furniture spotlights. By drilling the correct diameter for the spotlight, installing the spotlight was a breeze and connecting it to the transformer is done with plugs. Super simple.
Dimensions of my DIY project
The cabinet is 218.00 cm high, 210.0 cm wide and 38.0 cm deep.
Tip! Download our handy TOSIZE Furniture checklist!
What now?
Do you want to create this DIY project? This piece of furniture is part of our TOSIZE Furniture collection. Design your personalized, custom-made furniture using our 3D configurator! Want more information? Learn more about available colors, assembly, or browse all frequently asked questions. You’ll receive a TOSIZE Furniture package, including an installation kit.
€2,437.21
View all furniture