- TOSIZE.ie
- Do it yourself
- DIY Projects
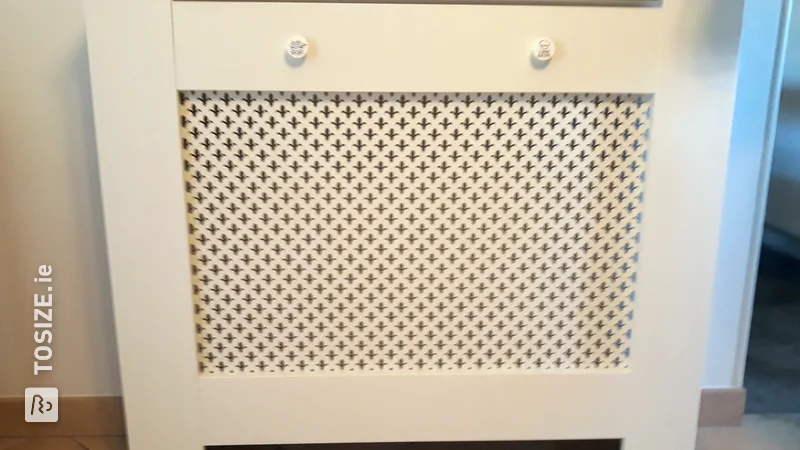
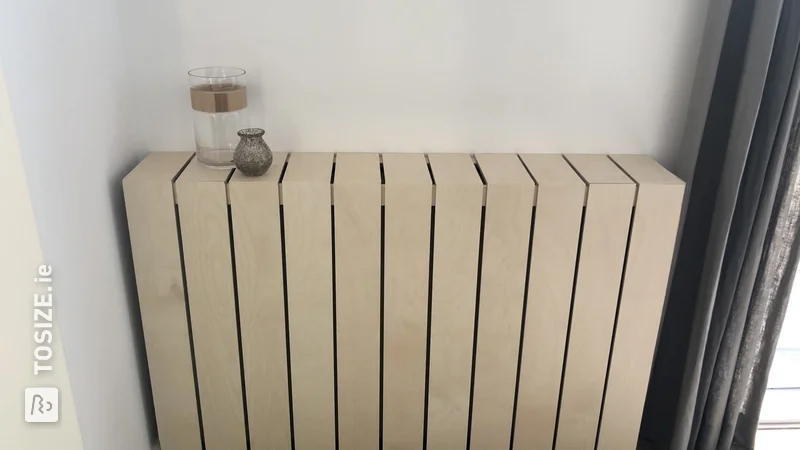
Self-made radiator conversion from plywood poplar, by Jeroen
Self-made radiator conversion from plywood poplar, by Jeroen
Create this project yourself with sheet material cut to size by TOSIZE.ie!
Jeroen
Average
3 minutes
Description by Jeroen
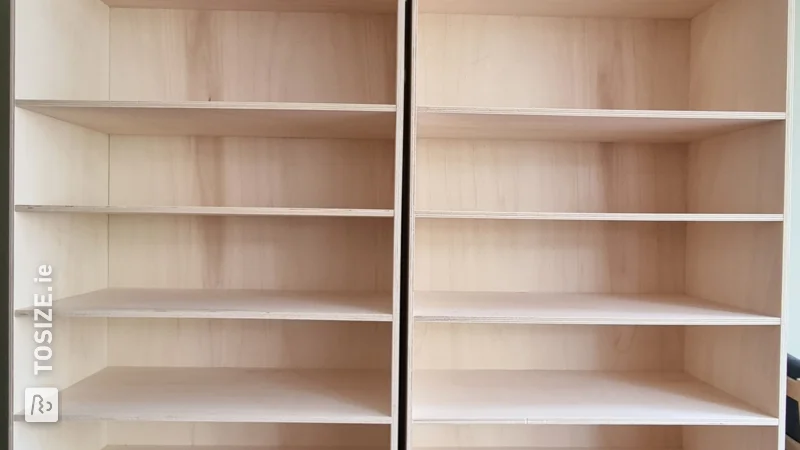
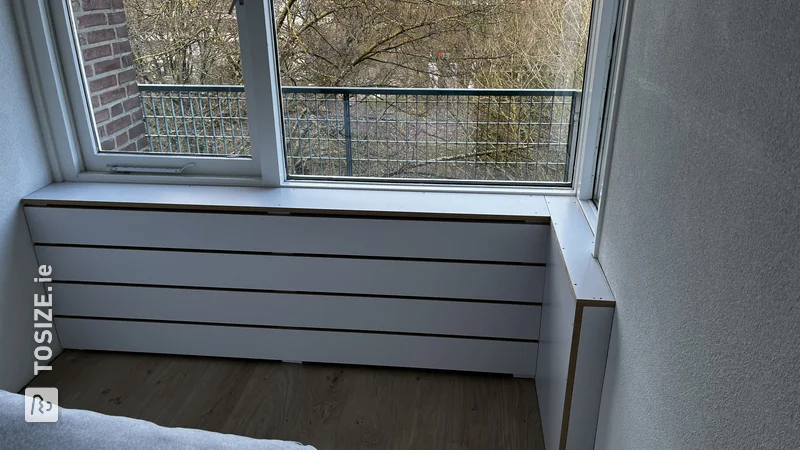
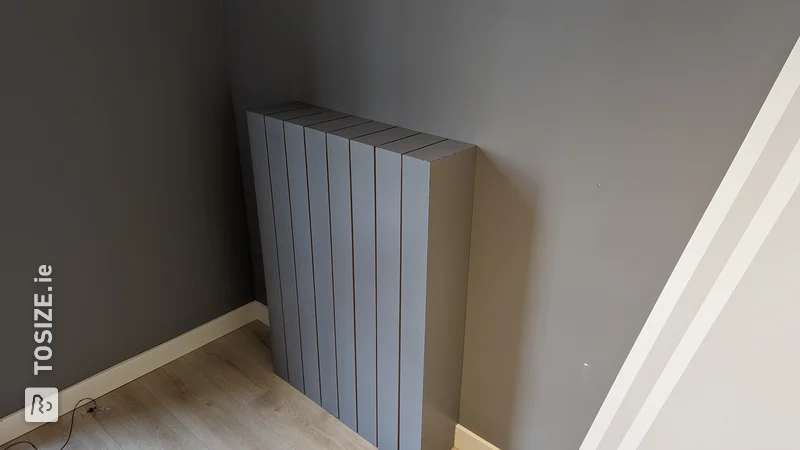
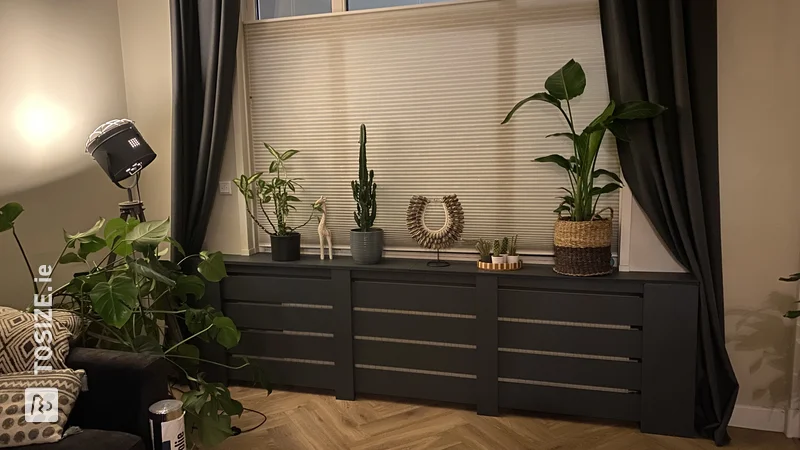
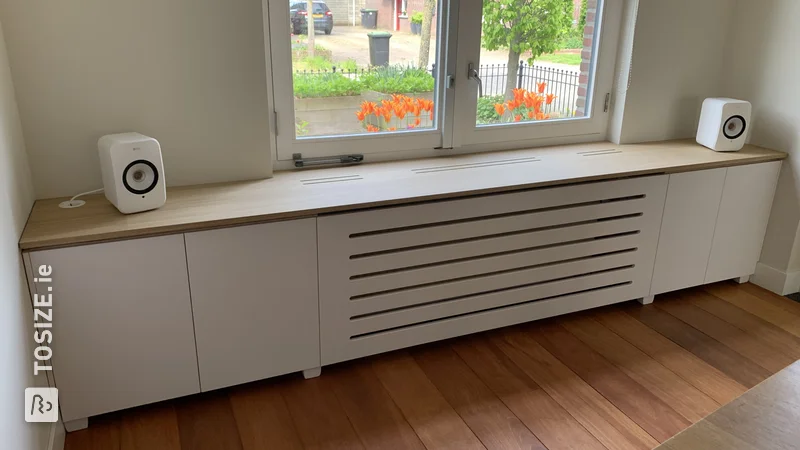
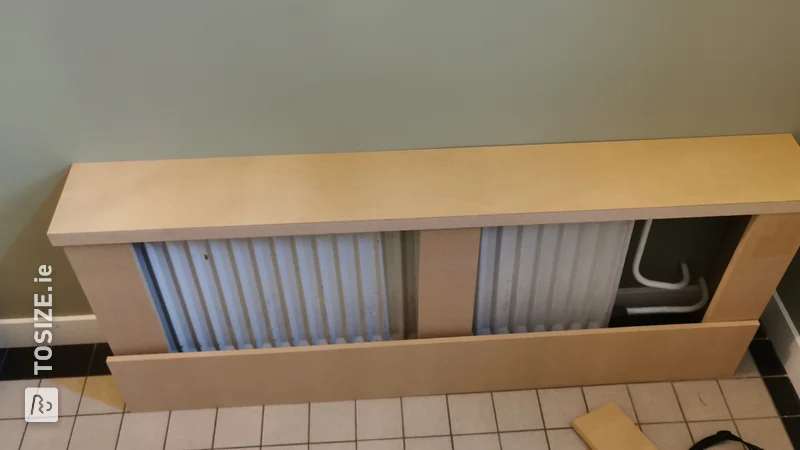
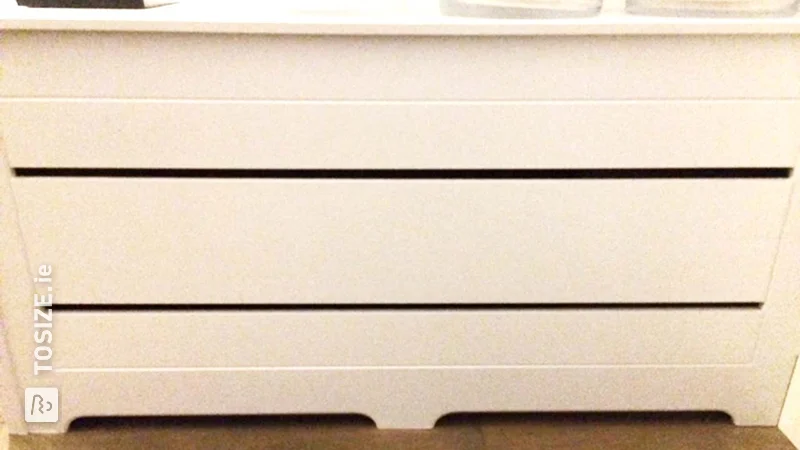
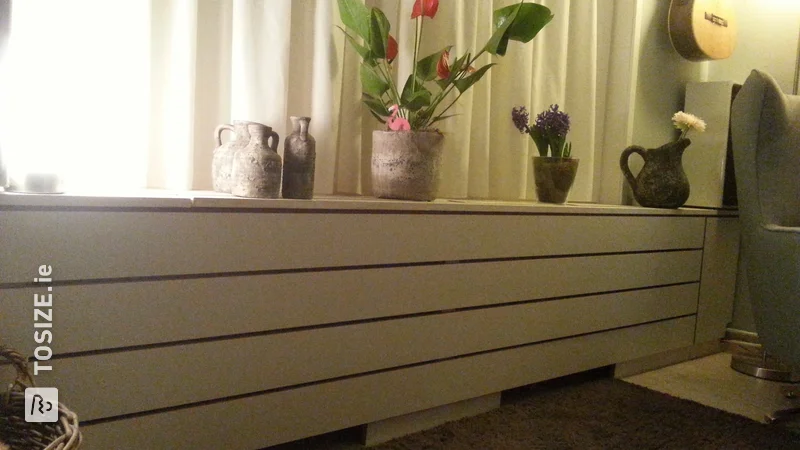
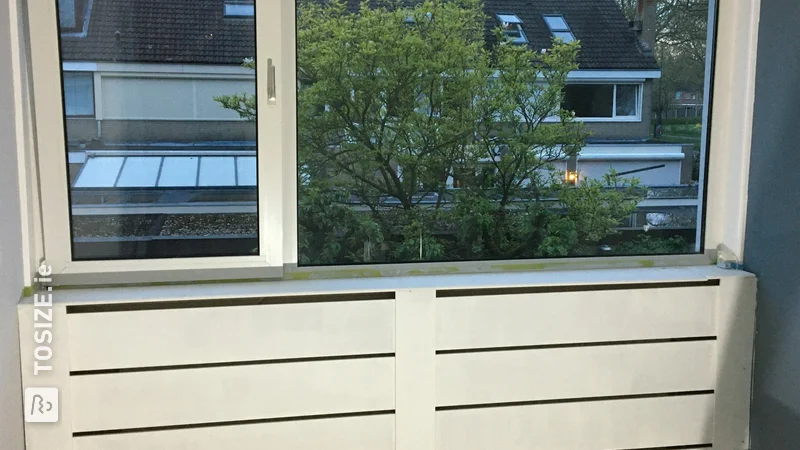
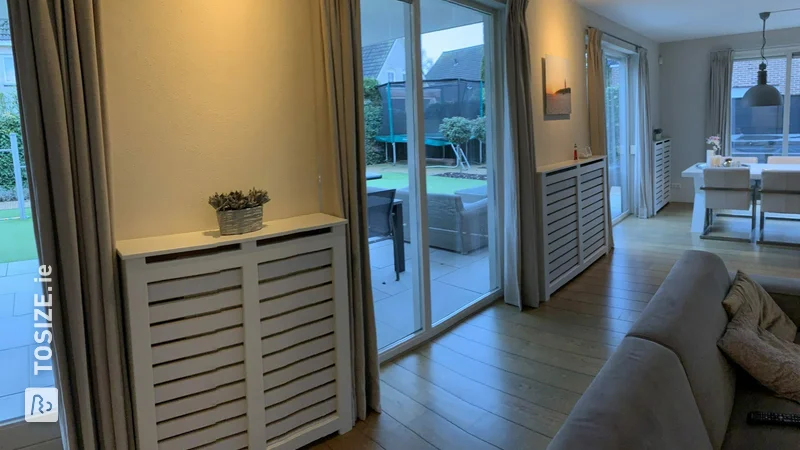
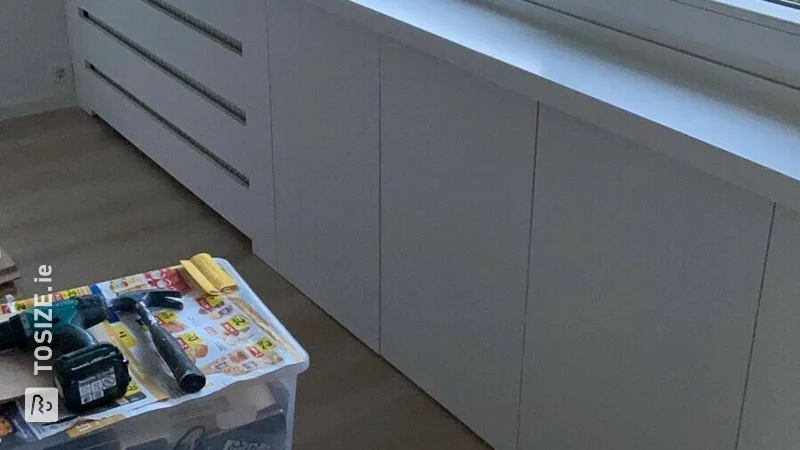
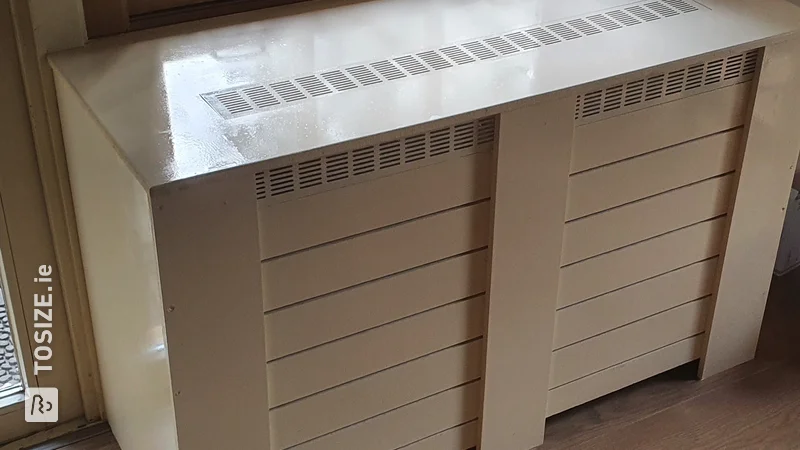
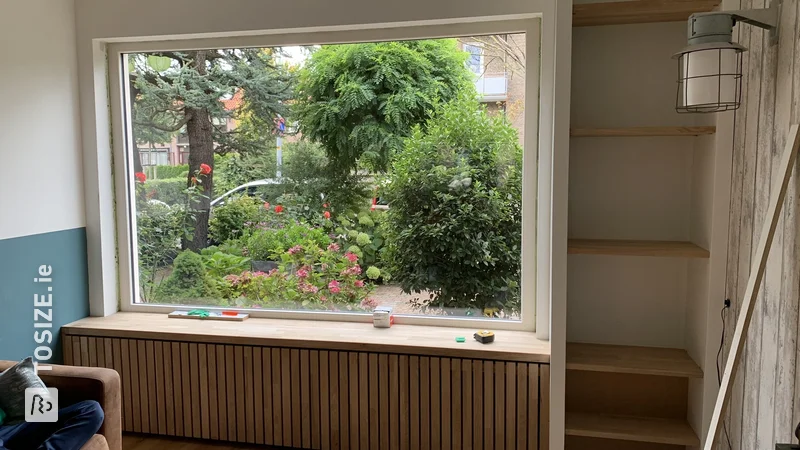
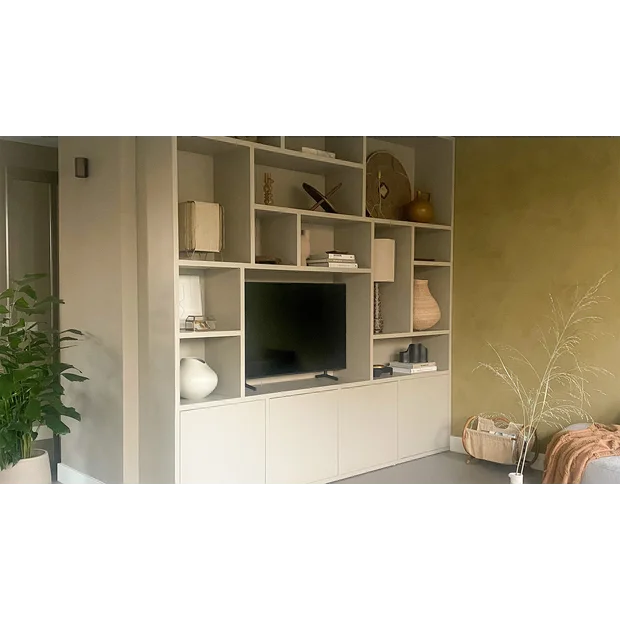
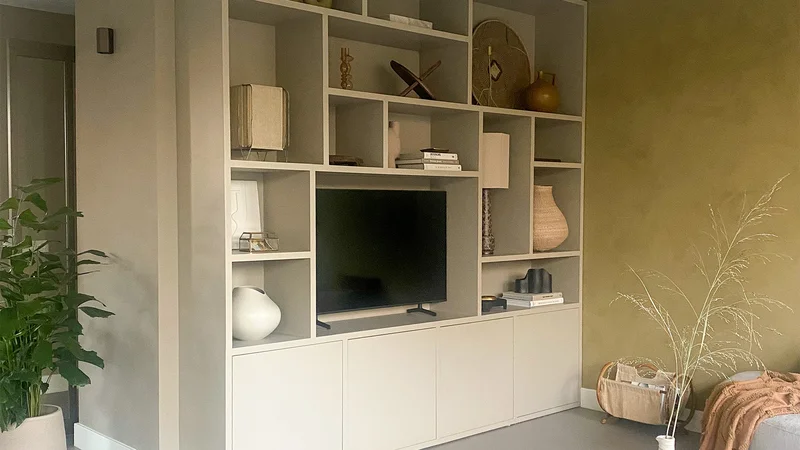
I wanted to conceal our (ugly) radiator by using a radiator cover. We often find the standard radiator covers available at hardware stores not aesthetically pleasing and too expensive, so I came up with the idea to make one myself. I also didn't want to lose too much heat with the cover, and with this solution, you still make full use of your radiator. Poplar plywood is a light type of wood with occasional beautiful patterns in it. It's the ideal wood for interior use. If the radiator cover becomes too dark, it immediately becomes one of those 'things' again, and we want to move away from all that darkness. We love light (white) accents combined with wood. By combining this sleek and stylish radiator cover with the new round corner sofa (taupe) and round tables (which by the way still need to come), it becomes a fantastic whole. And tell me, isn't it a sight to behold?
How I Made This Project
Here's what you need for a radiator cover measuring 329x60x35 cm (WxHxD):
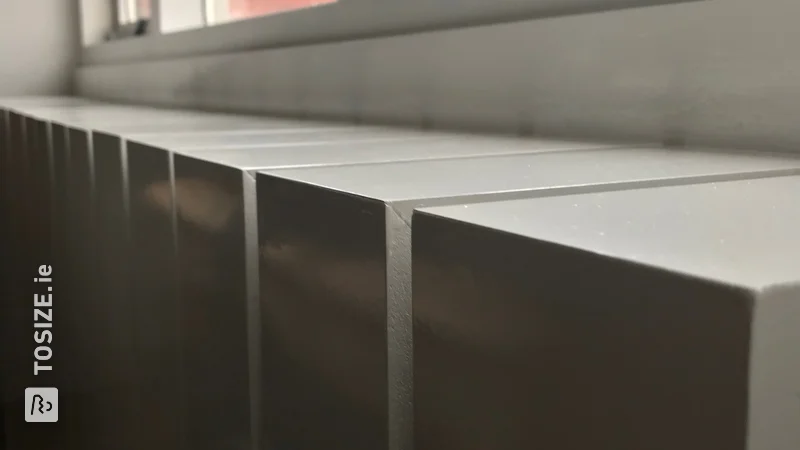
- 18mm poplar plywood 30x - 62x10cm (front)
- 30x - 37x10cm (top)
- 2x - 58.2x27.2cm (sides)
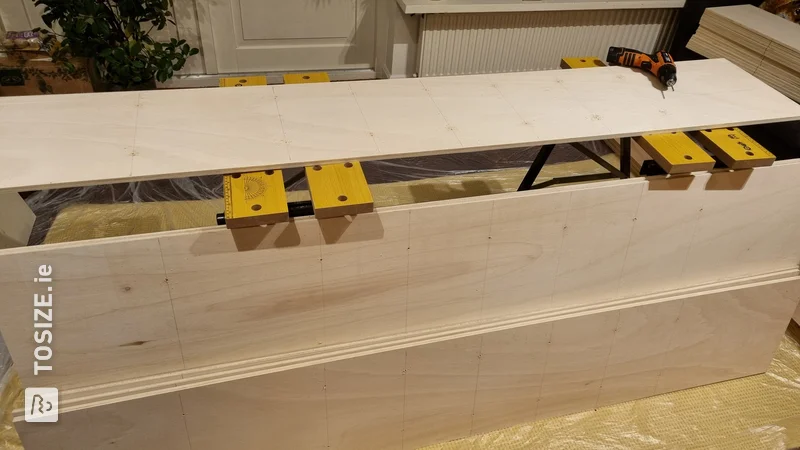
- 4x - Planed spruce battens 18x18mm (length 2700mm)
- 2x - Planed spruce battens 35x18mm (length 2700mm)
- 2x - Box of screws with countersunk head 3x30 mm (200 pieces per box)
- 1x - Box of screws with countersunk head 3x45 mm (200 pieces per box)
- 1x - Wood glue
- 1x - Aluminum square tube (10x10mm)
- 1x - Woodcon 1 liter (waterproofing)
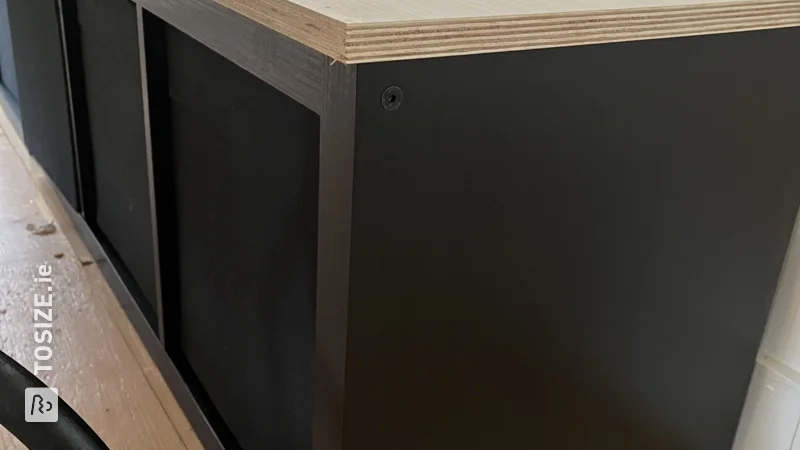
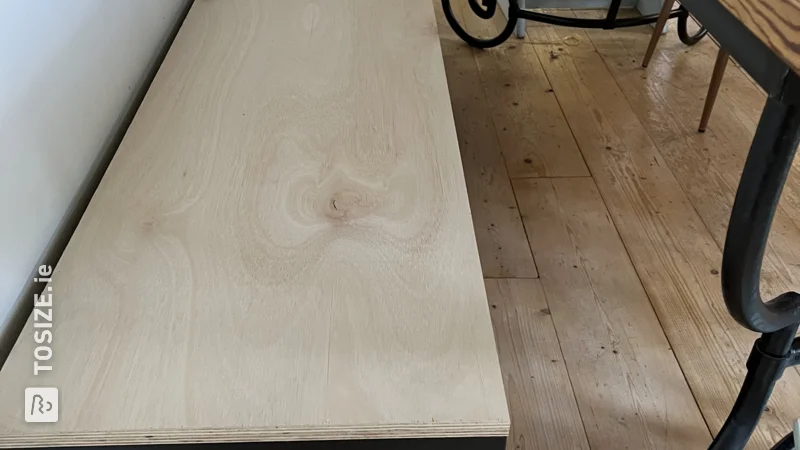
I drew all of this myself in AutoCAD, so I would have a good design. All the planks could be cut from one sheet, which I of course had cut to size by TOSIZE.ie. They didn't do miter cuts with plywood, so I did this myself with a miter saw. I used a fine saw blade to prevent splintering (BOSCH Circular Saw Blade Expert for Wood Ø 216x30x2.4 mm 48T). I also had the planks cut 2 cm longer. Make sure that after the miter cuts, the plywood planks are 35 cm (top) and 60 cm (front).
I then started with the left side. Take a 35 and 60 cm piece and glue them together with wood glue while sticking them to the plank (side 58.2x27.2cm). This way you immediately have a nice 90-degree angle. According to the drawing, make the spruce battens, glue and screw them. From there, continue building. For example, glue the 35x10 and 60x10 cm planks together every 10 on the mitered edge. Let it dry for a moment. Now place the side with spruce battens on the 60x10 cm plank section. Take one strip of 35x10 / 60x10 cm and slide it under the spruce battens. Put a little wood glue on it and place the aluminum square tube between the strips of 35x10 / 60x10 cm to create a one-centimeter gap. Screw it in place and then move on to the next strip. In the middle, you will need to extend the spruce battens. Do this in the middle of a strip! Once everything is ready, sand it and make it waterproof with Woodcon. You can do this with a roller and brush. The light color remains intact. Good luck!
Dimensions of my DIY project
H: 60.0 cm
W: 329.0 cm
D: 35.0 cm
Tip! Also check out our handy knitting tips!
How next?
Want to make this DIY project? Check out Jeroen's saw list and complete your order easily.
€ 368,06
All materials used
View all sheet materials